1. Create a CT in Proxmox#
- Download the “debian-11-standard_amd64” container template
- Deploy the above container template by clicking on “Create CT” on the top right of the Proxmox Web GUI (Keep the resources minmal)
2. Install dependencies#
- Once the container is created, update the container:
1
| apt update -y && apt upgrade -y
|
- Install packages
1
| apt install curl vim htop
|
3. Append following lines to lxc config file in proxmox host#
For example, if container ID is 101, then append the following lines to /etc/pve/lxc/101.conf:
1
2
| lxc.cgroup2.devices.allow: c 10:200 rwm
lxc.mount.entry: /dev/net/tun dev/net/tun none bind,create=file
|
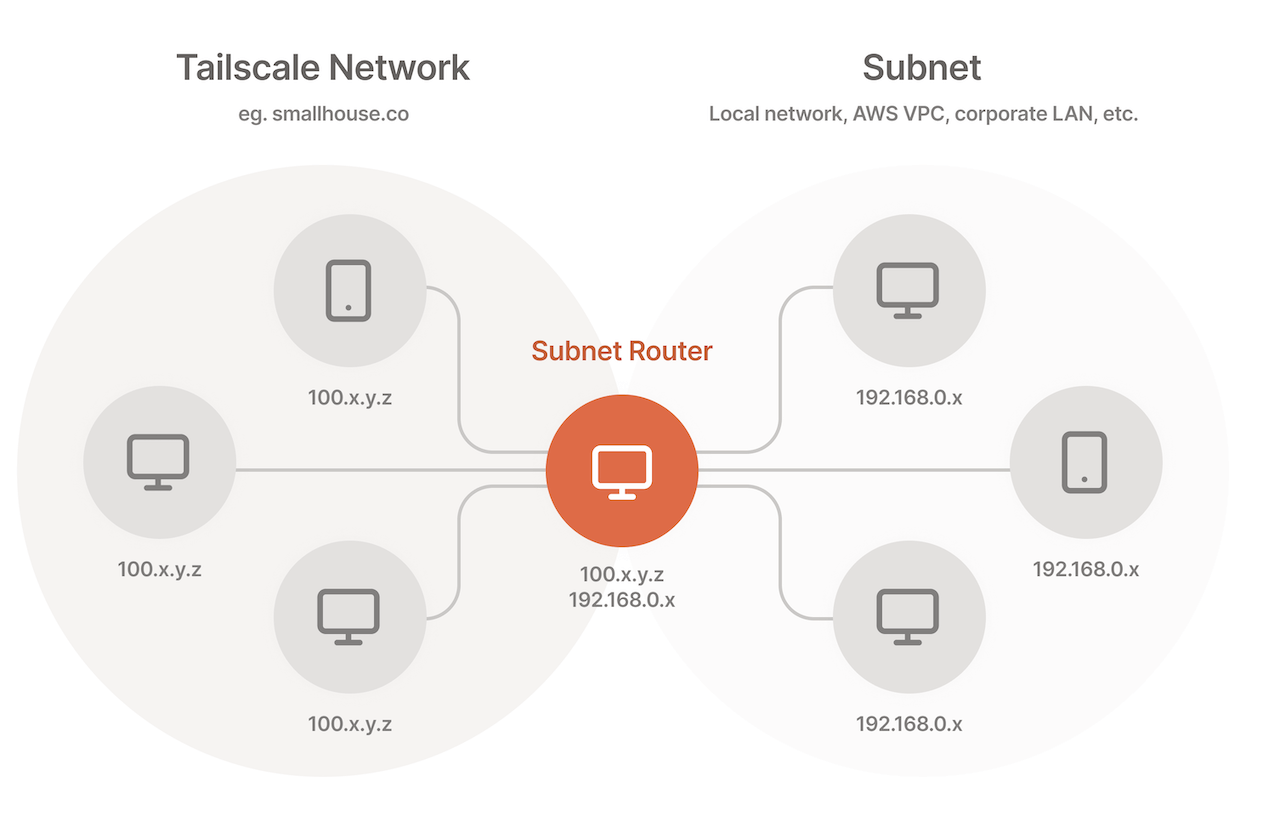
4. Install & Setup Tailscale#
- Add Tailscale’s package signing key and repository:
1
2
3
| curl -fsSL https://pkgs.tailscale.com/stable/debian/bullseye.noarmor.gpg | tee /usr/share/keyrings/tailscale-archive-keyring.gpg >/dev/null
curl -fsSL https://pkgs.tailscale.com/stable/debian/bullseye.tailscale-keyring.list | tee /etc/apt/sources.list.d/tailscale.list
|
- Install Tailscale:
1
2
| apt update
apt install tailscale
|
- Connect your machine to your Tailscale network and authenticate in your browser:
1
| tailscale up --advertise-routes=10.0.1.0/24
|
- Enable the Subnet Route
- Go to the 3 dots on the right of the new machine
- Click on “Edit route settings”
- Toggle the subnet route for the new IP range that you introduced
- Optionally, also disable key expiry